How to Create Your First Knolli
Overview
Creating your first Knolli is the fastest way to see how your own knowledge can power an AI copilot.
A Knolli is an intelligent workspace that learns from the files, documents, and data you upload. You can customize how it speaks, what it knows, and even how it interacts with your users. This guide walks you through setting up your first Knolli from the dashboard.
Create a Knolli
Log in
Open Knolli.ai and sign in with your account credentials. You will arrive at your dashboard.
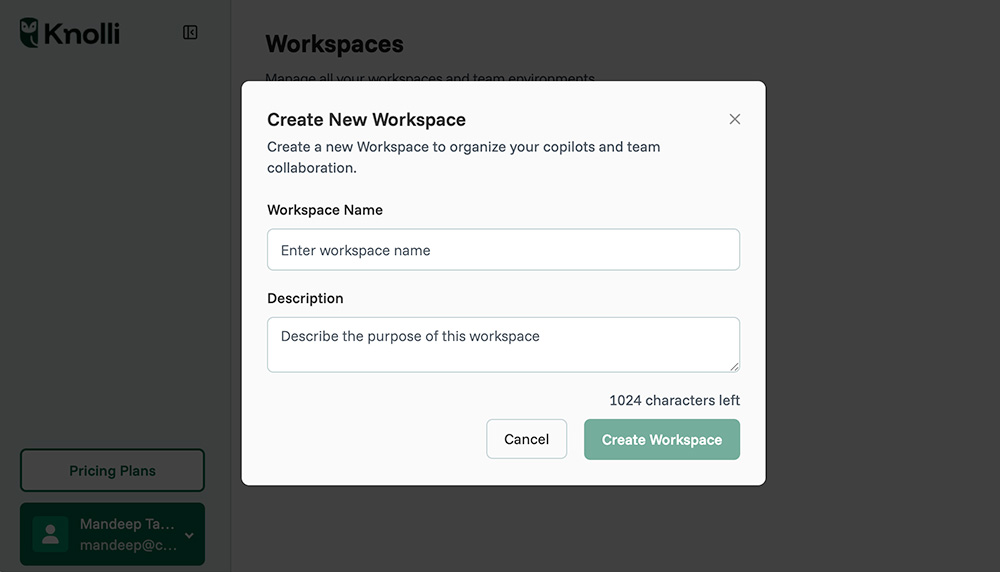
Create a workspace
When you log in for the first time, you will see a blank dashboard. Click on Create Workspace to create your first workspace.
Create a copilot
Once you create your new workspace, you will have the option to create your first copilot.

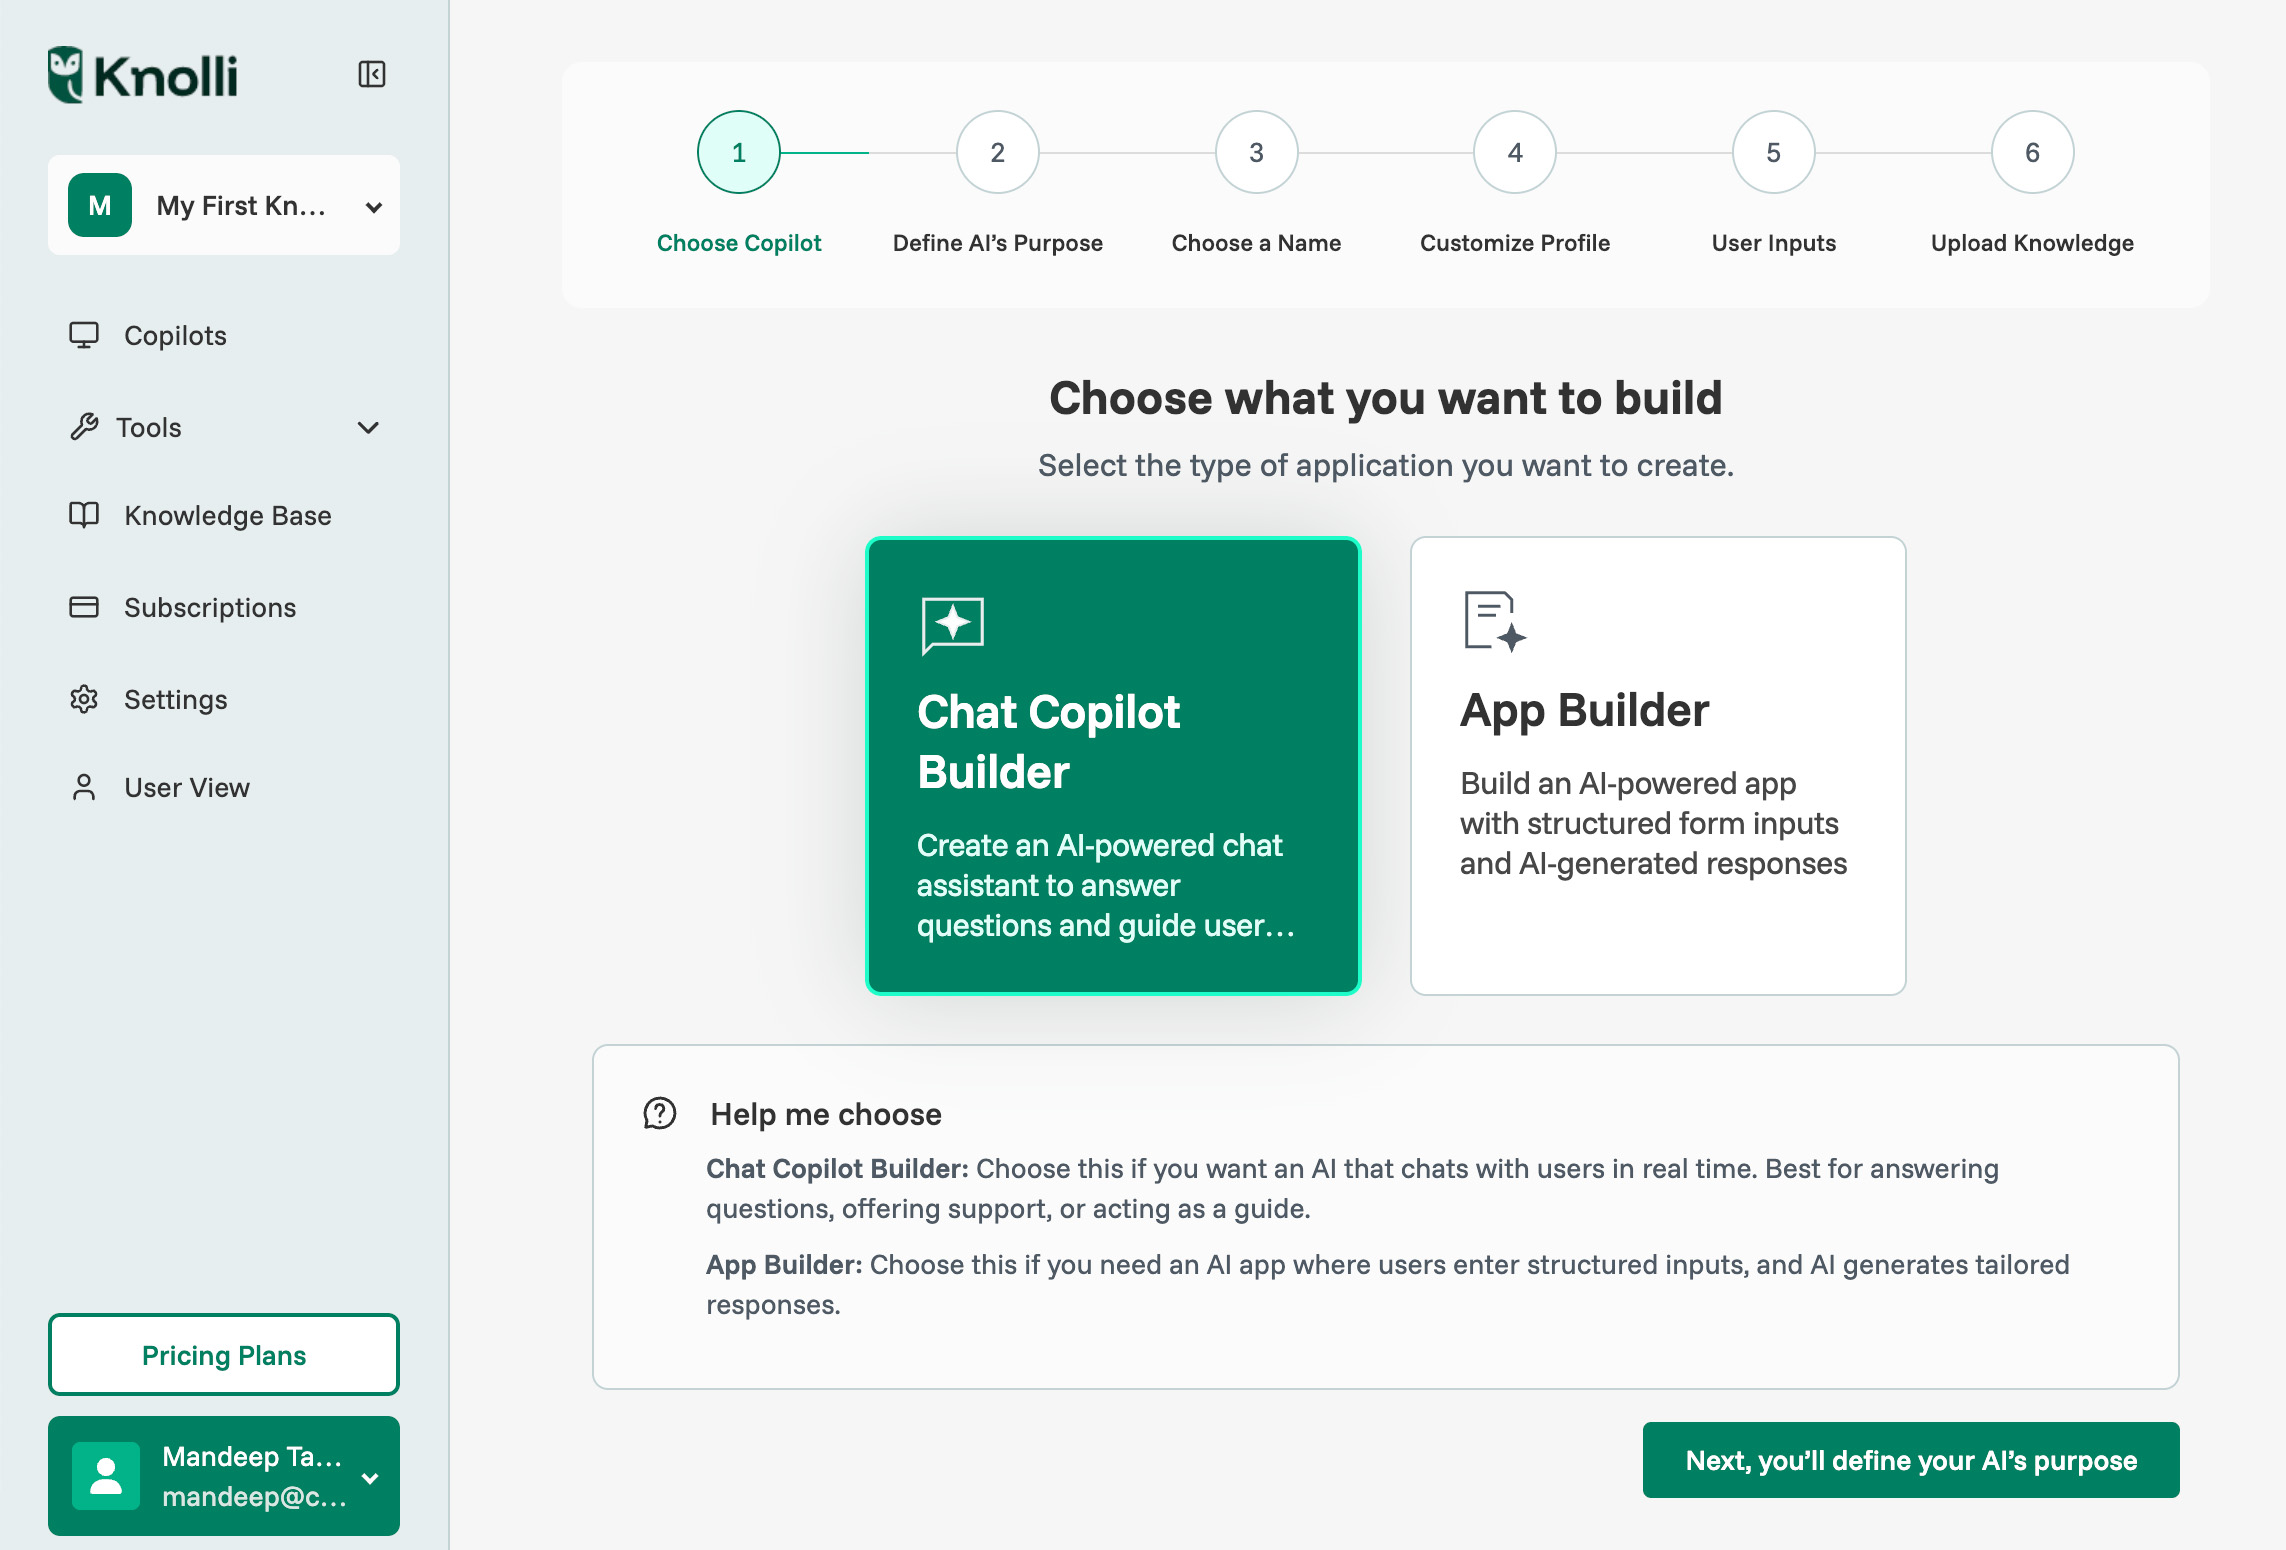
Click on Create a Copilot to create your first Knolli. You will arrive at the Knolli copilot creation wizard, which will walk you through the copilot creation process. There, you will have the option between building a Chat Copilot or a Content Generation App.
Choosing a chat copilot will allow you to build a conversational chat interface with agents, integrations, and workflows. Choosing app builder will allow you to create a form-based content generation app (i.e. LinkedIn posts, articles, resumes, etc.)
For this example, we will be choosing Chat Copilot. Click next to move to the next step.
After selecting your application type,
- Go to “New Knolli”
- On the sidebar or main dashboard, select Create New Knolli. This opens the creation window.
- Enter a name and description
- Give your Knolli a clear, descriptive name. Add a short summary so you remember what this Knolli will do. Example: “Finance Copilot for client reporting” or “Investor Readiness Assistant.”
- Choose a base model
- Select the language model you want to use. Options typically include OpenAI GPT, Gemini, or Llama. Each model has different strengths, such as creativity, speed, or privacy controls.
- Click “Create Knolli”
- Knolli will generate the base structure for your new AI. This only takes a few seconds.
- Add your first data source
- Once your Knolli is created, open the Knowledge tab and upload your content. You can add PDFs, documents, spreadsheets, or links to trusted sources. This is how your Knolli learns your specific knowledge.
- Set a basic prompt
- In the Settings or Behavior section, add a short system prompt. This defines how your Knolli should behave. Example:
- “You are a friendly finance assistant that helps fractional CFOs create quick budget reports and summaries.”
- Preview your Knolli
- Click Preview or Chat to test your Knolli. Ask it a few questions based on your uploaded content to confirm that it responds correctly.
- Publish your Knolli
- When you are satisfied, click Publish to make your Knolli live inside your workspace. You can always edit, refine, or add more data later.
Tips or Common Issues
- Keep your first Knolli simple. Start with one or two documents and test how it performs before adding more.
- If your Knolli does not respond, check that your data has finished processing. Large files may take a moment to index.
- Use clear, consistent file names so it is easier to locate your uploads later.
- If you receive an error during creation, confirm that your workspace is active and you have available model credits.
- You can duplicate a Knolli at any time to test new prompts or data without affecting the original.
Next Steps
You have now created your first Knolli and uploaded your initial data. The next step is to learn how Knolli organizes your projects and teams.
Read Understanding Workspaces and Knollis to see how workspaces keep your projects, collaborators, and copilots organized.